Generic settings
The Generic Settings section within the Settings Module is designed to allow administrators to configure essential, system-wide settings that affect the overall operation and user interface of the platform.
The Generic Settings is divided into 4 sub-sections -
- System Settings
- App Settings
- Content Settings
- Booking form Settings
System Settings -
- Helper Text: Helper text functionality is designed to assist users by providing additional context or instructions. You can toggle it on when you need it.
- Languages: Administrators can choose which languages are available for the system, ensuring that the interface can use the platform in preferred languages and for communication purposes.
- Operators Type: This dropdown allows the selection of the types of transportation operators recognized within the system, which could range from taxis and buses to ride-sharing services and more.
- System Distance Unit: Here, the default unit of measurement for distances within the system is selected, such as kilometers or miles, according to regional preferences or operational standards.
- Payment Type: Here you can specify the type of payment, for example, 'prepaid'.
- Payment Method: Here you can specify the mode of payment.
- Time Zone: This setting enables the system to operate under the local time zone, which is crucial for accurate scheduling and time stamping throughout the platform.
- System Currency: The platform's default currency setting is configured here, allowing financial transactions and fare displays to be standardized in a currency like the US Dollar, Euro, or any other applicable currency.
- Customer Review Options: This field specifies the default options available for customer reviews within the app. The administrator can set what parameters or criteria customers can use to rate services, limited to a certain number of characters and separated by commas for clarity.

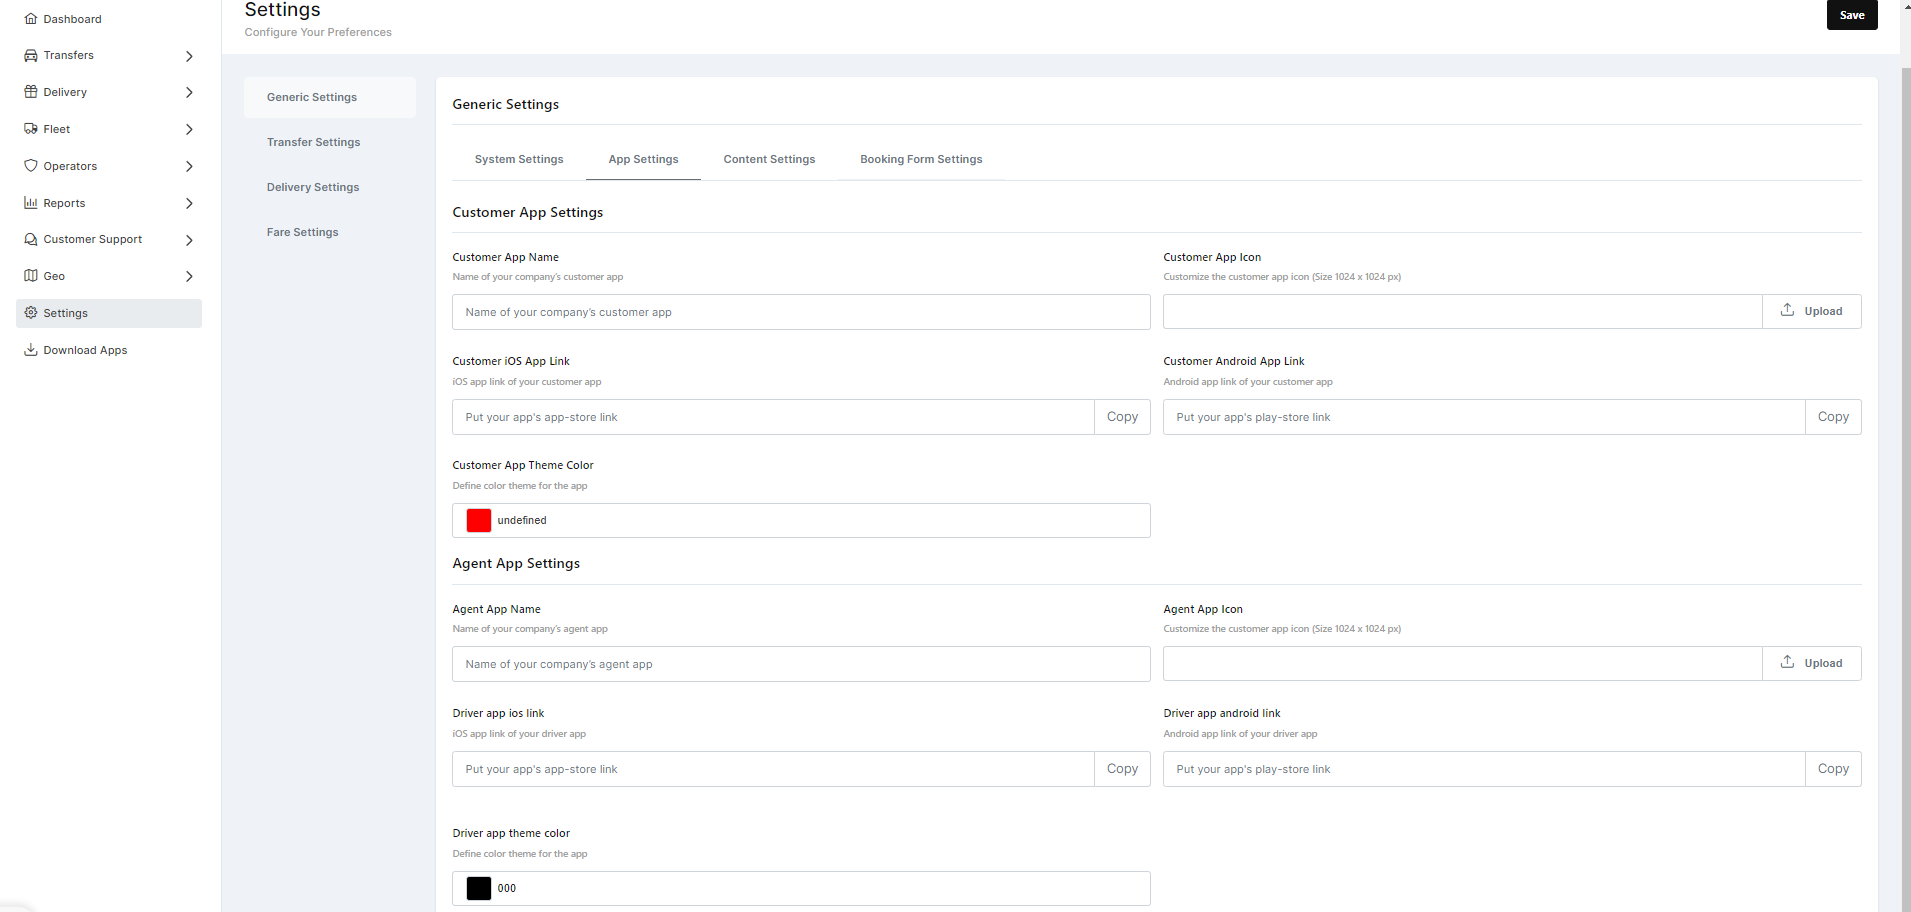
App Settings -
Customer App Settings :
- Customer App Name: This field allows for the input of the name of the customer application as it will appear to users.
- Customer App Icon: Here, administrators can upload or change the app icon, which represents the visual identity of the app.
- Customer iOS App Link: Provides a field for the URL where iOS users can download the customer app, often linked to the App Store.
- Customer Android App Link: Similarly, this is for the URL where Android users can download the customer app from the Google Play Store.
- Customer App Theme Color: Administrators can select a color that will define the theme of the customer app, usually aligned with the branding color scheme.
Agent App Settings :
- Agent App Name: Just like the customer app, this is where the name of the agent application is specified.
- Driver App Icon: This upload field is for the driver or agent app icon, which can be customized to differentiate it from the customer app if necessary.
- Driver iOS App Link: Administrators provide the link for the iOS version of the agent app.
- Driver Android App Link: This is for the link to the Android version of the agent app.
- Driver App Theme Color: This setting allows for the customization of the theme color for the agent app, which could be distinct from the customer app to avoid confusion.
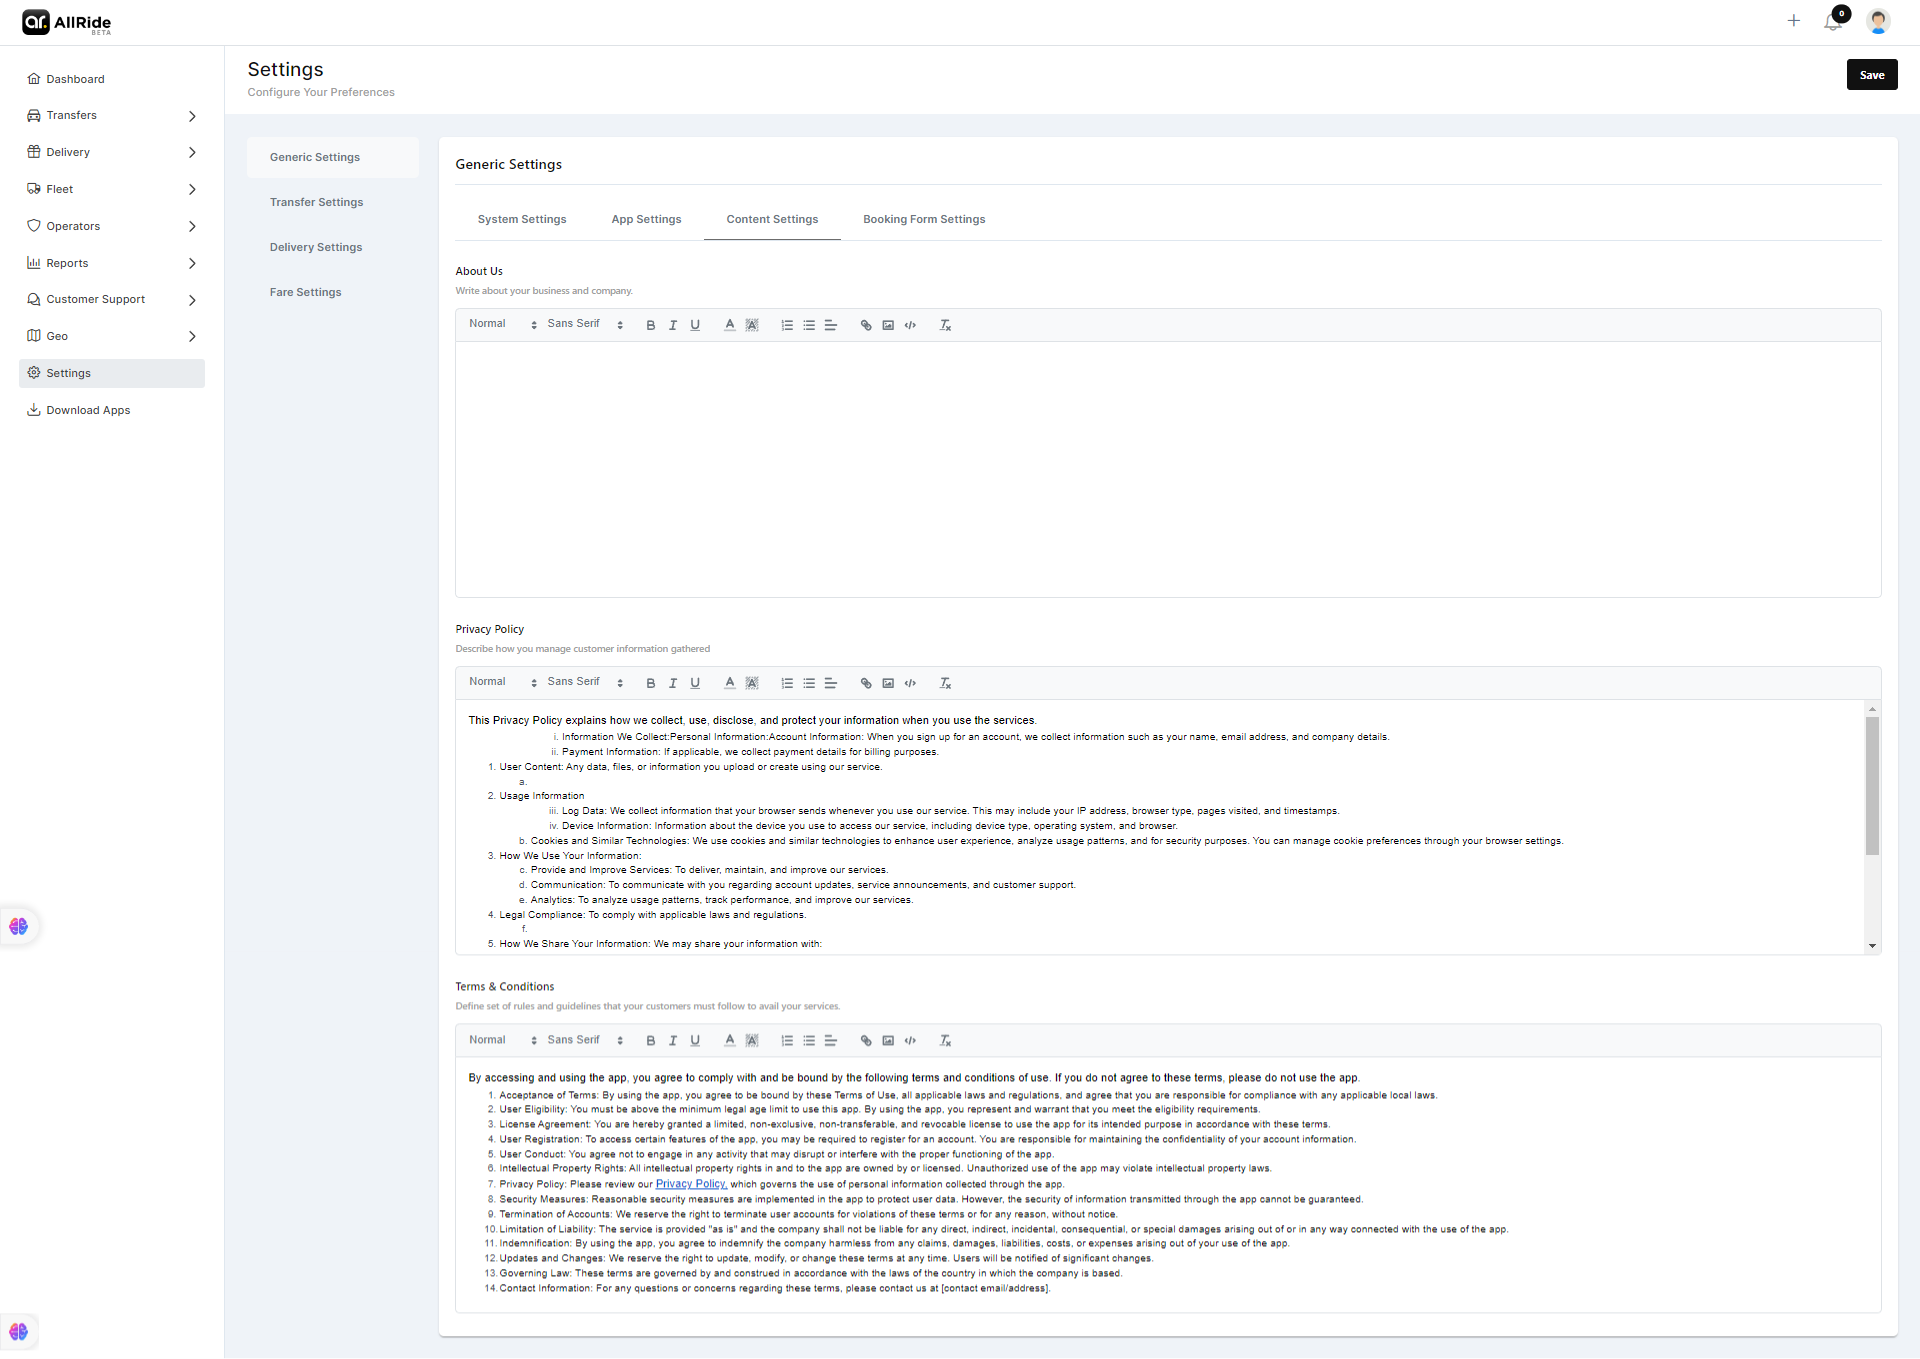
Content Settings -
The Content Settings section allows administrators to define and edit the substantive content that informs users about the business and legal parameters of the service:
- About Us: This text field is for the company to introduce itself to users. Information typically includes the company's history, mission, core values, and services offered.
- Privacy Policy: This important section is where the company details how it collects, uses, and manages customer information. Transparency in privacy policies is crucial for user trust and may be legally required in many jurisdictions.
- Terms & Conditions: Here, the company outlines the rules and guidelines that customers agree to follow when using the service. It can include payment terms, service limitations, cancellation policies, and other legal stipulations.
After filling in or editing the content in these fields, clicking "Save" commits the changes to the system, while "Cancel" will disregard any changes made. This section is essential for communicating the company's policies and practices to users, ensuring clear understanding and compliance.
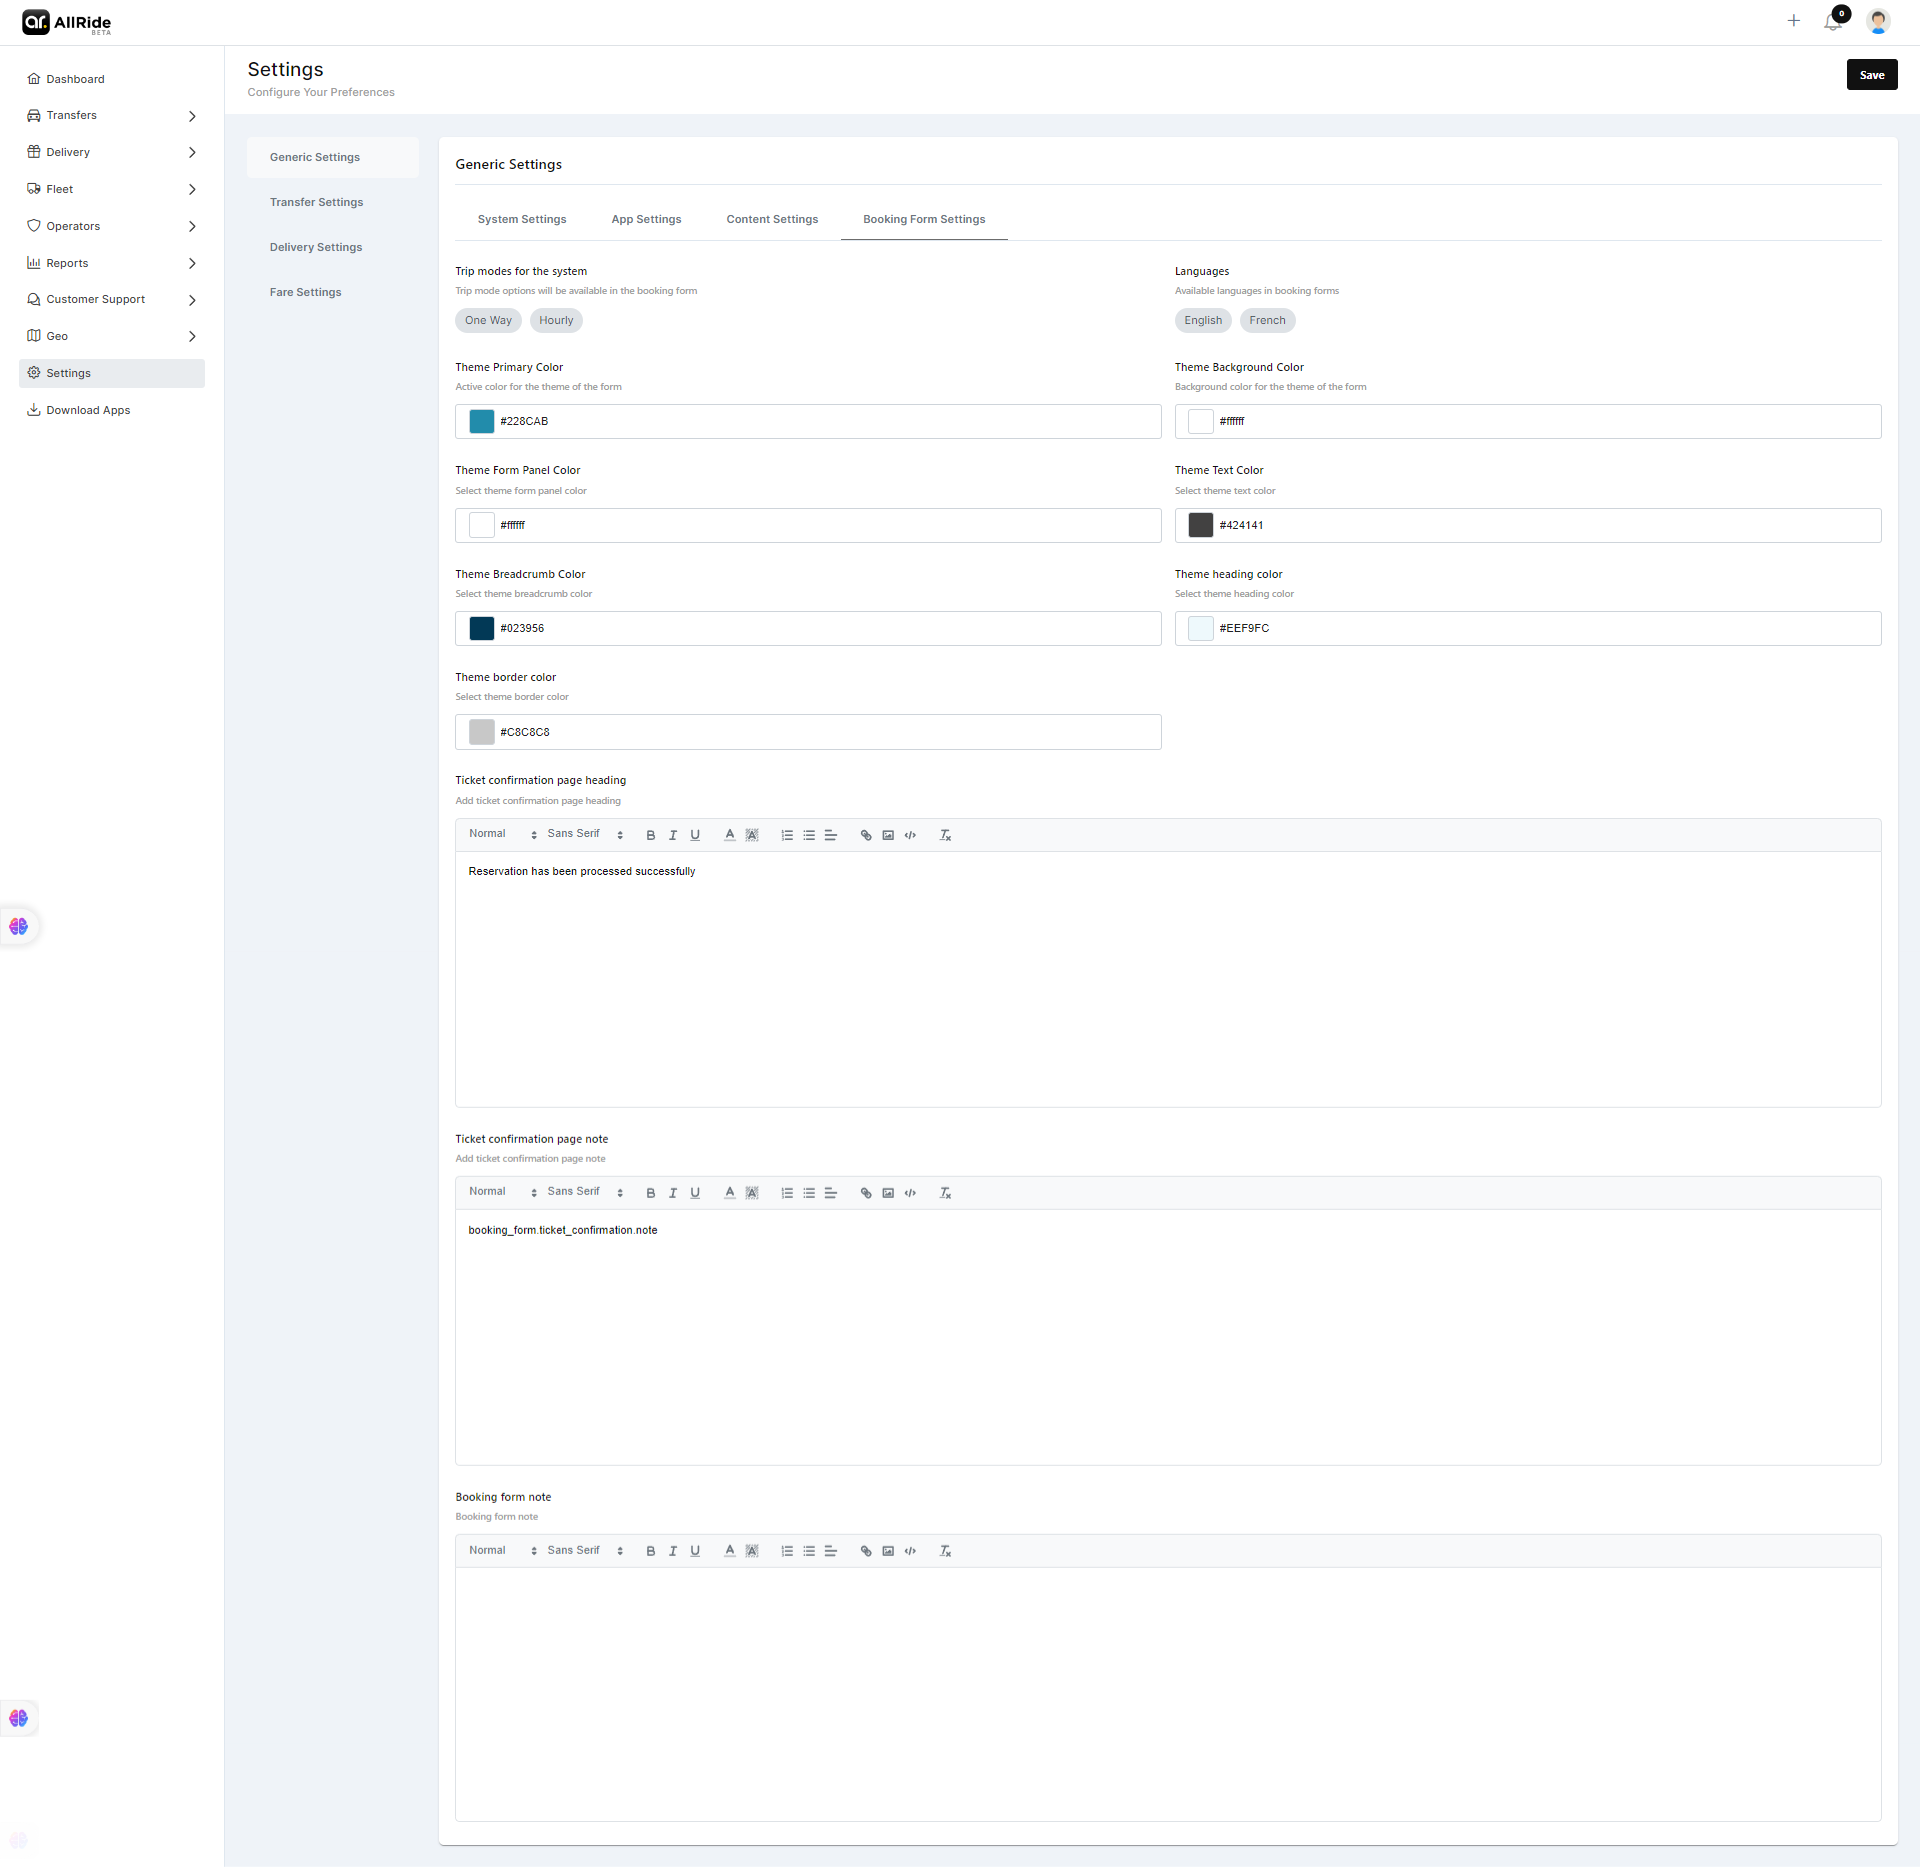
Booking Form Settings -
The Booking Form Settings section allows administrators to customize the reservation interface to align with company branding and to provide a seamless user experience.
- Trip Modes: Here, various travel types that can be booked via the form are listed. The admin can select which modes (e.g., One Way, Hourly, Direct, Round Trip) are available for customers when booking a trip.
- Languages: This option allows for the selection of languages that the booking form supports, ensuring users can interact with it in their preferred language.
- Theme Primary Color: The color picker here sets the primary color theme for the booking form, often matching the company’s brand colors.
- Theme Background Color: This sets the background color of the booking form for design consistency.
- Theme Text Color: The color selected here will be used for the text within the booking form, enhancing readability against the background color.
- Theme Form Panel Color: This color applies to the background of form panels where users input information.
- Theme Breadcrumb Color: The breadcrumb trail that shows the steps in the booking process will use this color.
- Theme Heading Color: This color is for the headings within the form to make them stand out.
- Theme Border Color: Borders within the form will use this color, which can help define the structure of the form fields and buttons.
- Ticket Confirmation Page Heading: Administrators can define the text that appears as the heading on the ticket confirmation page.
- Ticket Confirmation Page Note: Here, any additional notes that need to be communicated to users upon confirmation can be added.
- Booking Form Note: Any notes or instructions that should appear on the booking form itself for the user's information are placed here.