Trips
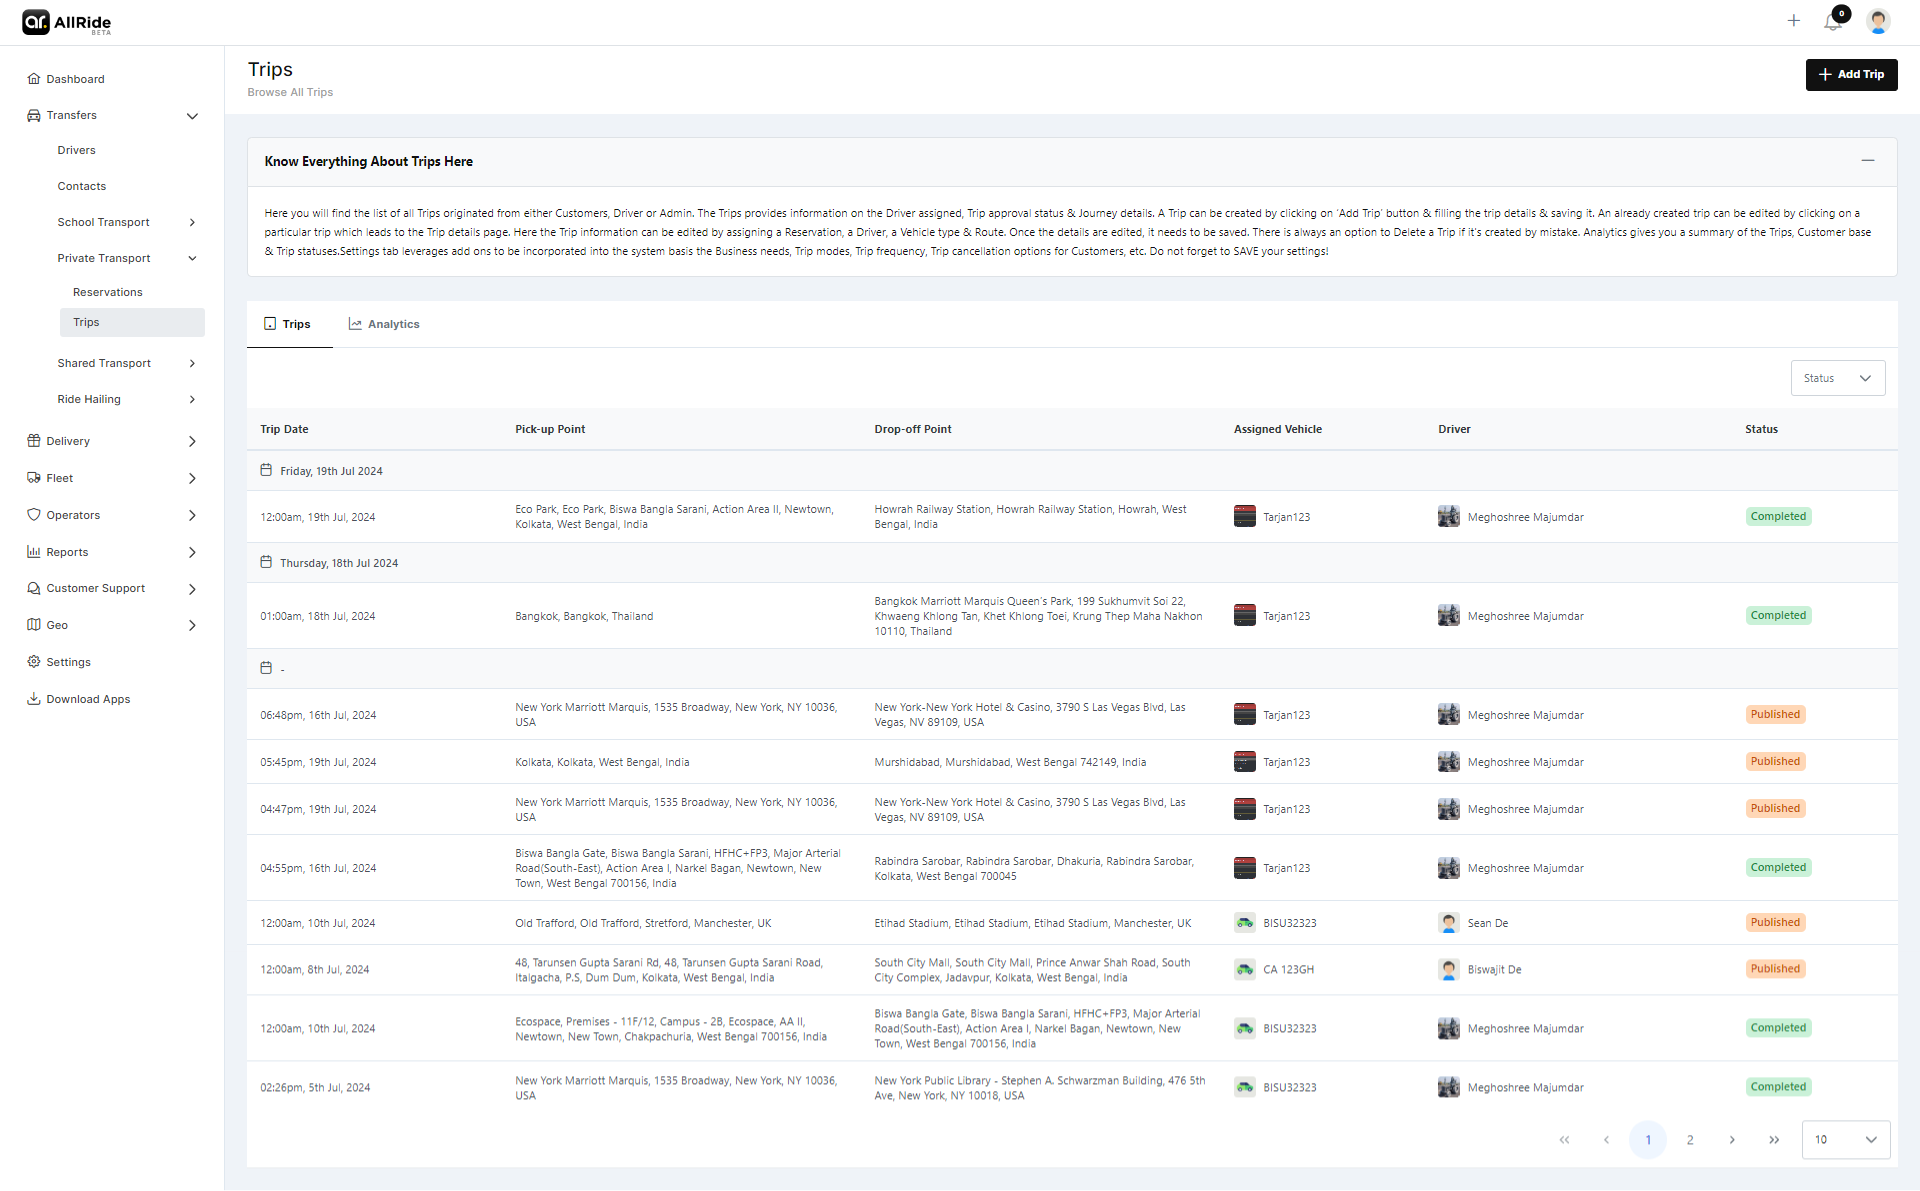
In the "Trips" section of the AllRide app, you’re presented with an organized view of all trip-related information. This area is essential for managing and reviewing the details of journeys booked through the system. Here’s a description of the displayed information and available actions:
Functionalities
Trip Entries
Each entry in the list provides key information about individual trips:
- Reference No.: A unique identifier is assigned to each trip for tracking and management purposes.
- Assigned Vehicle: Indicates the vehicle allocated to the trip, providing details like the vehicle model or registration number.
- Driver: The name of the driver who is, or will be, operating the trip.
- Trip Started: Marks the actual start time of the trip. It is left blank if the trip hasn’t begun.
- Trip Ended: Signifies the completion time of the trip. This also remains blank until the trip is finished.
- Status: Displays the current status of the trip, such as 'Published', which could indicate that the trip is confirmed and visible to all necessary parties.
Navigation Controls
- Users can browse through the trip entries using pagination controls at the bottom, allowing them to navigate between different pages to view more trips. This section is designed to provide a comprehensive and user-friendly interface for managing the logistical aspects of trips, whether for personal review by customers or detailed management by service operators.
Settings
In the "Settings" section for trips within the AllRide app, users have the ability to customize various aspects of how trips are managed and offered. Here's an explanation of each part of the settings page based on the provided image:
Add-on Settings:
- Add-on Facility Options: This area allows the user to manage additional services that can be uploaded by drivers or admin. These add-ons could be items like child seats, extra luggage space, or special accommodations. For each add-on listed, there's a name and a corresponding price in USD. Users can add new add-ons using the "+" button or remove them with the trash can icon.
Trip Settings:
- Trip Modes for the System: Users can define the types of trips that the system offers. For instance, the option "One Way" is shown, but there could be others to select from such as "Round Trip" or "Hourly Hire".
- Trip Frequency: This dropdown lets users set how often the trips are available for booking, with options like "Daily," "Weekly," "On Demand," etc.
Trip Cancellation Reasons for Rider:
- This section allows the user to input and manage different reasons riders can select when canceling a trip. These reasons help understand customer behavior and can improve service offerings. Examples provided include "Taking too much time" and "Driver not responding". New reasons can be added, and each reason has a character limit for brevity and clarity.
After making any changes or adjustments in this section, users must click the "Save Changes" button to ensure that all modifications are applied to the system.
The "Settings" section is crucial for tailoring the trip-booking experience to the needs of the business and its customers, ensuring that the service remains responsive and user-friendly.
Trip Details
When you select a trip from the list, in this case, Trip #A840, you are brought to a detailed page that provides a comprehensive view of the trip's specifics. Here's what each section of the trip details page contains:
Map View:
- Displays a map that likely indicates either the planned route or the actual path taken by the vehicle. This visual tool helps in understanding the geographical context of the trip.
Reservations Section:
- This might list linked reservations, indicating specific bookings associated with the trip. However, in this screenshot, that part of the section isn’t shown or detailed.
Trip Information:
- Trip Status: Shows the current status of the trip, here indicated as 'Published', which means the trip is active and visible within the system.
- Actual Duration of Trip: The real-time duration of the trip, which will be recorded once the trip has been completed.
- Distance Covered: This field will display the total distance traveled once the trip is finished.
- Trip Reference: A unique identifier for the trip, here provided as a combination of letters and numbers.
- Start Date & Time and End Date & Time: The scheduled start and completion times for the trip, which are not filled in the current view.
Route Information:
- Route Name: The predefined name for the route taken or to be taken by the vehicle, in this case, 'Ecospace to New Town'.
- Zone: The zone or area in which the route lies, indicated here as 'Zone Z'.
- Start Station and End Station: The precise starting and ending addresses for the trip.
Booking & Additional Information:
- Operator: The entity responsible for operating the trip, is listed here as 'Johnson & Sons Co.'.
- Booking Date: When the trip was booked, which isn’t provided in this view.
- Created at and Updated at : Timestamps indicating when the trip details were initially entered into the system and the last time any information was updated.
Passenger, Driver, and Vehicle Info:
- Number of Adults/Children/Infants: The number of passengers in each category will be listed here.
- Number of Bags: How many pieces of luggage are accounted for on the trip.
- Driver: The name of the assigned driver, 'Aniket Basu' in this case.
- Vehicle Type: The class or model of the vehicle used, a 'Toyota Quantum Minibus' here.
- Vehicle: The specific vehicle registration or identifier, 'TOYOTA123B'.
Edit and Delete Functions:
- At the top, you have the option to 'Edit' the trip details or 'Delete' the trip entirely from the system.This detailed view ensures that all aspects of a trip are transparent and accessible for efficient management and review, be it by the customer, the driver, or the admin personnel.

Add Trip
When creating a trip within the system, you will be guided through a step-by-step process to select the necessary information for each aspect of the trip. Here's how you can go about selecting the details accordingly:
1. Assign Reservation:
- Click on the 'Select Reservation' button.
- A list of available reservations will appear. These are likely pre-booked by customers or admins and contain details such as the date, time, passenger information, and destination.
- Choose the reservation that corresponds to the trip you are creating.
2. Assign A Vehicle:
- After selecting the reservation, proceed by clicking 'Select Vehicle'.
- This will bring up a list of available vehicles in the fleet. The list may include details like vehicle type, capacity, and availability status.
- Select the vehicle that best fits the requirements of the reserved trip.
3. Assign A Driver:
- Click on 'Select Driver' to assign a driver to the trip.
- You will see a roster of available drivers along with relevant information such as their driving schedule, ratings, or proximity to the trip’s starting point.
- Pick a driver who is available at the scheduled time and is suitable for the journey.
4. Assign Operator:
- By clicking 'Select Operator', you can assign the trip to an operator, which could be a person or a dispatch team responsible for overseeing the trip.
- From the list, choose the operator who will manage the trip's logistics, ensuring they have the capacity and resources to do so effectively.
5. Assign Route:
- Finally, click on 'Select Route'.
- This will allow you to set the specific route for the trip. Depending on the system, this may include predetermined routes or the option to create a custom route based on the trip’s start and end points.
- Select the appropriate route that matches the reservation details and meets the passenger's needs.
Throughout this process, the system will guide you through each selection to ensure that all the necessary details are covered for the trip. Once you've made all the selections, you can review the details and then save the trip by clicking the 'Save' button, or choose 'Cancel' if you need to exit without saving.